Adjust start, flips, & end
When you press Stop recording, Groovemark shows you where the music starts, each flip, and where it ends. Check each one, drag a handle to perfect, then save.
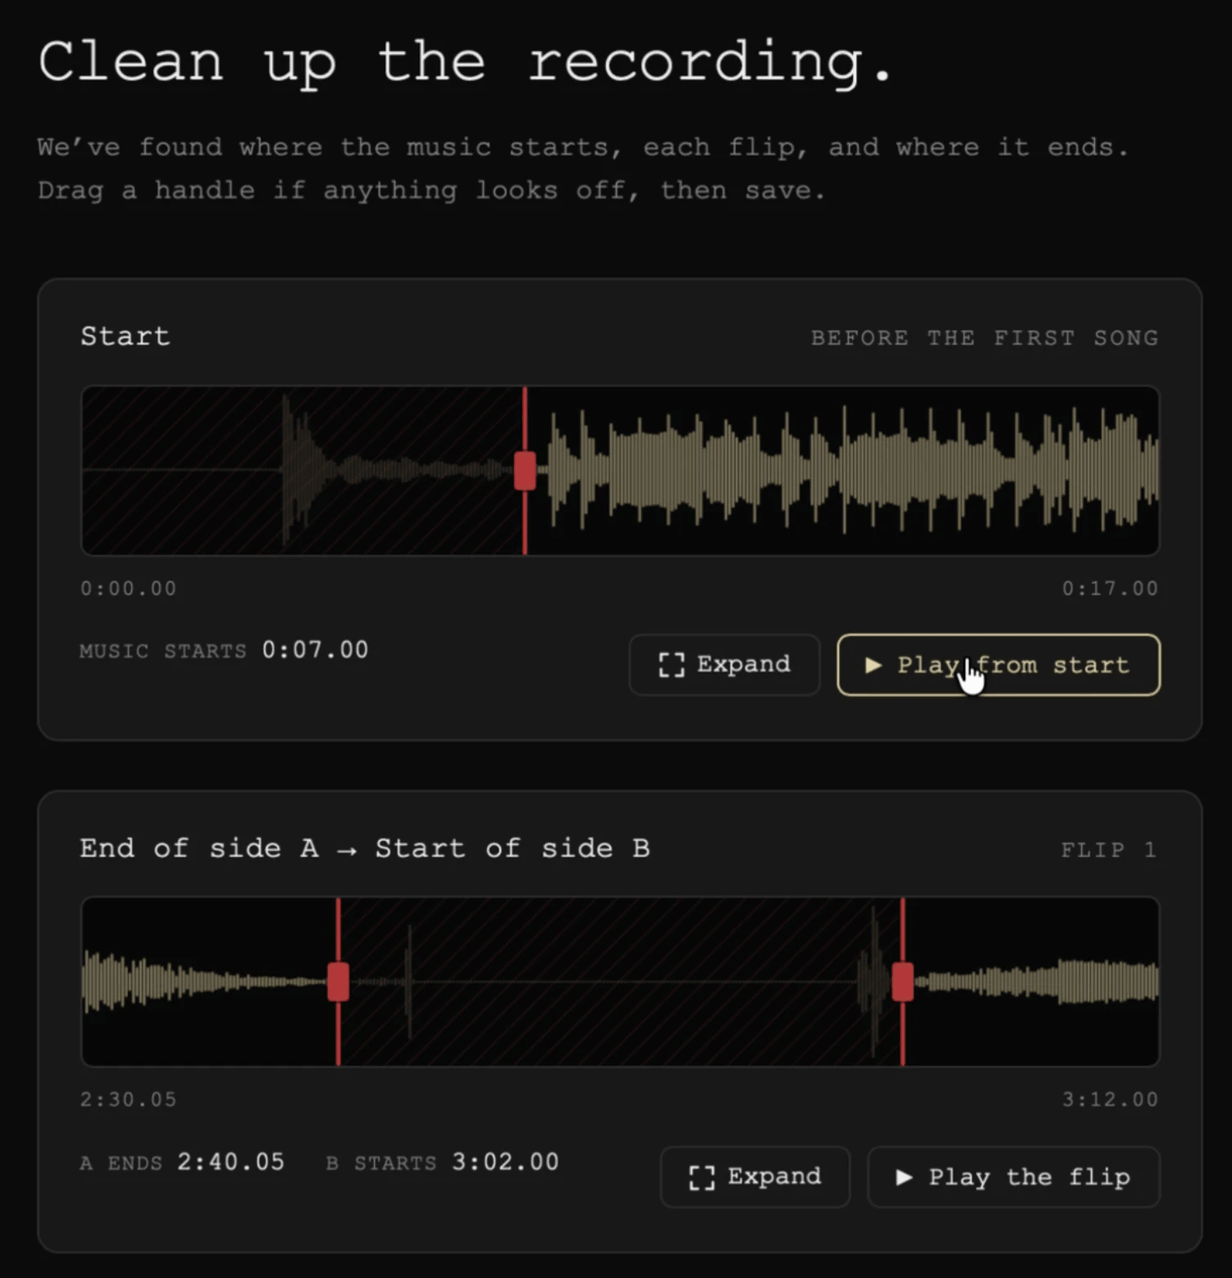
Each row is one edit point
- Start. Everything before the first song goes: the needle drop and the lead-in.
- Each flip, "End of side A → Start of side B". Two handles: the side's last note and the next side's first. Everything between becomes clean silence.
- End. Everything after the last song goes: the run-out and the needle lifting.
The handles are red, and what goes is dimmed. A cassette has no needle lifts, so a cassette recording shows Start and End only.
Listen before you move anything
Each row has its own play button, and each one plays a few seconds past its handles, so you hear exactly where the cut falls. Play from start begins just before the music and plays the opening, Play the ending plays the close and a little after it, and Play the flip plays straight through, from just before the side ends to just after the next one starts, so you can hear where a fade really ends.
Move a handle
Drag it. From the keyboard, Tab to a handle and use the arrow keys, holding Shift for bigger steps.
Expand for a bigger view
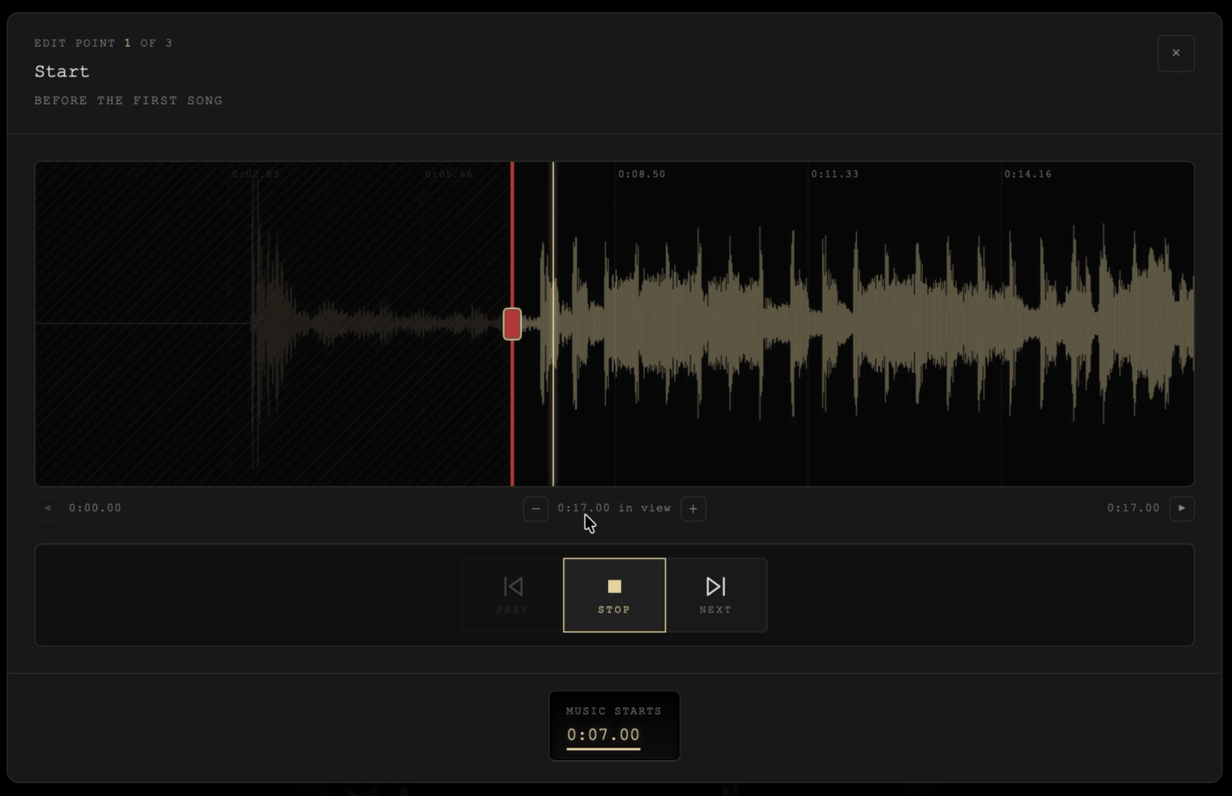
Press Expand on any row for the same big view as Refine: zoom, slide the waveform, page with ◀ and ▶, and step between the edit points. On the last one, Save recording… takes you straight to the save screen. See Refining the cuts.
Save your master
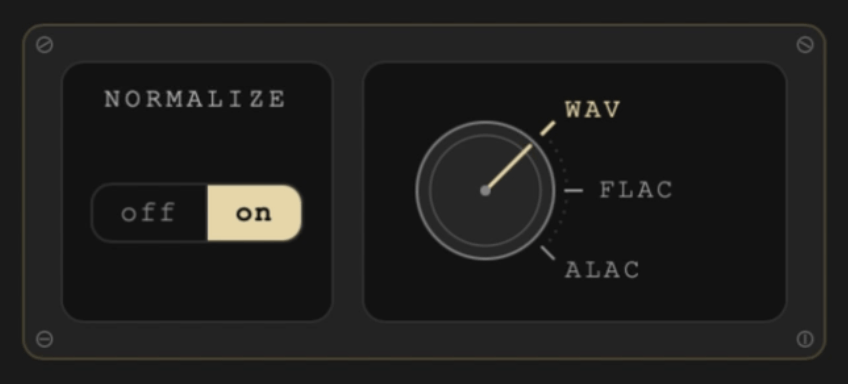
The cleaned-up recording is your master. Press Save recording… under the rows, and the save screen opens:
- Name. Filled in with the date and time. Type your own if you like.
- Saves to. The Masters folder. Change… picks another folder for this master only, and Show in Finder opens the folder.
- Normalize raises the whole recording so its loudest moment sits just under full volume. It starts on.
- Format is WAV, FLAC or ALAC. All three are lossless. It starts on FLAC.
Press Save recording. Groovemark writes your master from Start to End, with each flip turned to clean silence, and checks the file before it's done. If the name is already taken, it asks first: replace the old file, keep both, or cancel. Back to the cuts returns to the edit points just as you left them.
Master saved
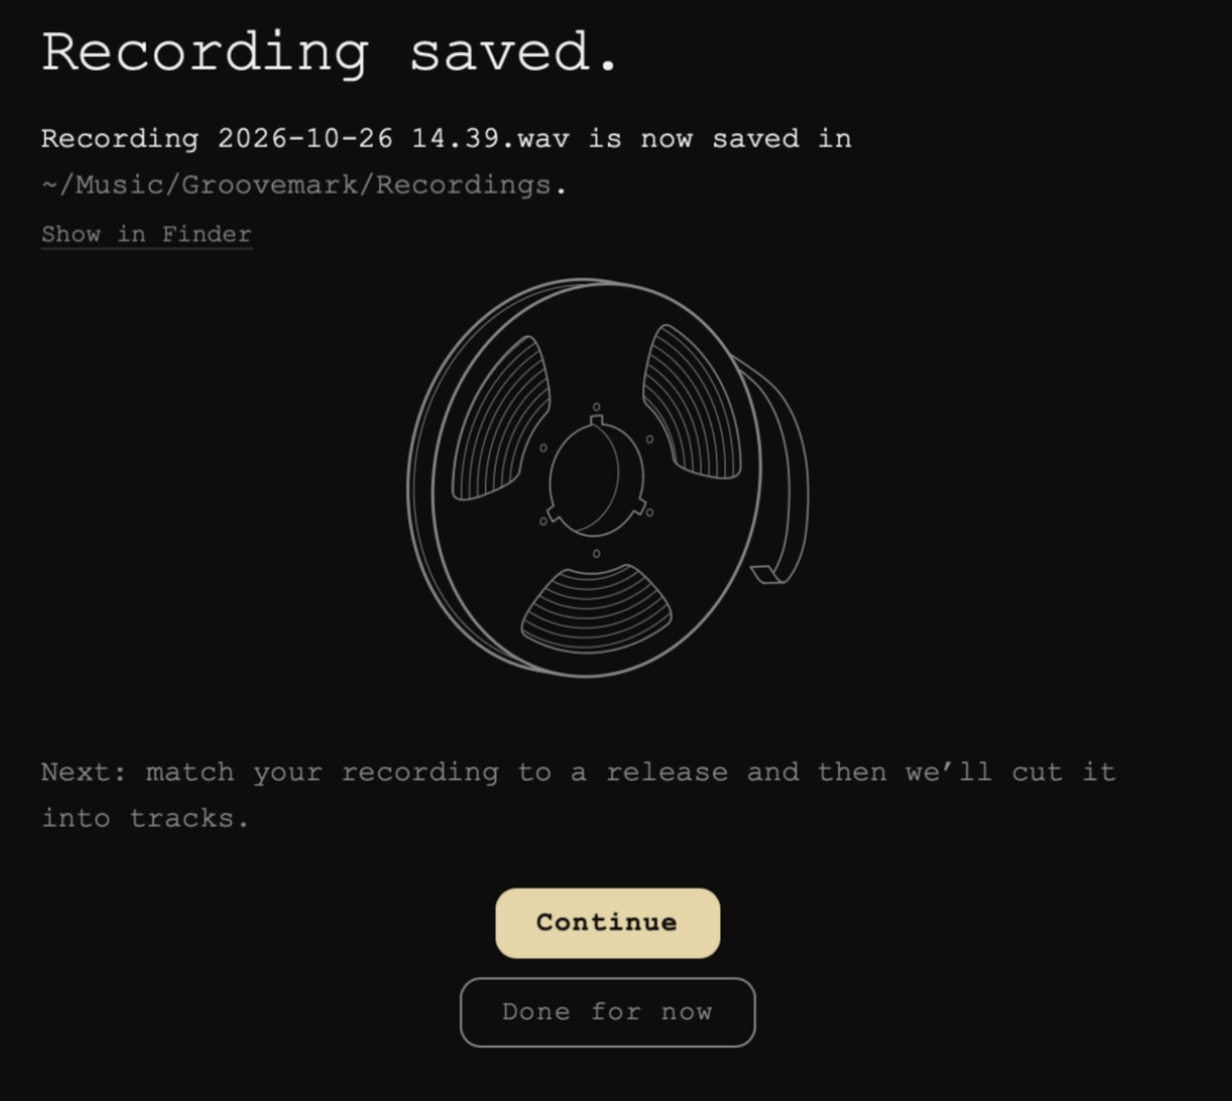
The next screen shows your master: its name, how long it runs, its quality and size, and where it went, with Show in Finder.
- Continue goes straight on to finding your album and cutting it into tracks. There's nothing to drag in.
- Done for now keeps your master in its folder. Upload it whenever you're ready.
Where masters go
Masters have their own folder, apart from your albums. See Where your files are saved.
Starting over
Start over asks first, because it throws the whole recording away. Keep editing takes you back.
Next
Press Continue and tell Groovemark which album it is.
Still need help? hit us up.